Graphic Design

Background Removal / Clipping Paths

What is the Difference?

In short… background removal is just that, the removal of the background from an image.  Whereas a clipping path is a mask that is hand drawn by the pen tool, sets out which part of the images will be affected when the mask is placed, and is non-destructive to the original image, unlike background removal.

Read the long version.

Understanding the difference between destructive and non-destructive in terms of a photoshop image is important in helping to decided which of these methods is going to be a better option for you.

Destructive means that it permanently effects or changes the pixels of the image.  Non-destructive changes can be reverted, or should I say “turned on and off” at will.  Sounds like a no brainer, right?  Why would anyone ever choose destructive or non-destructive?  Well, the reason would boil down to time, efficiency, and budget.  Creating a clipping path requires extra steps and therefore is a longer process.  If the area being removed is not needed, than why spend the extra time, effort, and money to remove it?  Especially if you are working with a significant number of images.

Here are some examples that might help paint a clearer picture.

Example #1 - Photography session of products for a catalog.  All the products will have a similar grey background with the company logo imposed behind the product.  There are 300+ items.

Best Choice - Background Removal.  Since the background is not needed at all, there is no point in spending the extra time and money (whether it is being outsourced to us or you’re paying your in-house graphic designer) to perform the extra steps needed to preserve the products background.

Example #2 - Photography session with a model at the beach who will be posing in a swimsuit in 10 different color variations.

Best Choice - Clipping Path.  Since, the model and the swimwear are the subject, they will have a clipping path created around them, but by preserving the background, the graphic designer can separate the model while performing edits to the background separately.  Maybe the background is blurred to put more focus on the model, maybe the lighting is off. With them separated using a clipping path, there is much more control over the finished product.

Pro-Tip:  Create a clipping path of the model as well as one of her swimsuit.  By doing so, you could take and pay for 1 shot of the model instead of 10.  Using that clipping path of the swimsuit you could create all the other color variations in post production within minutes for a fraction of the cost.
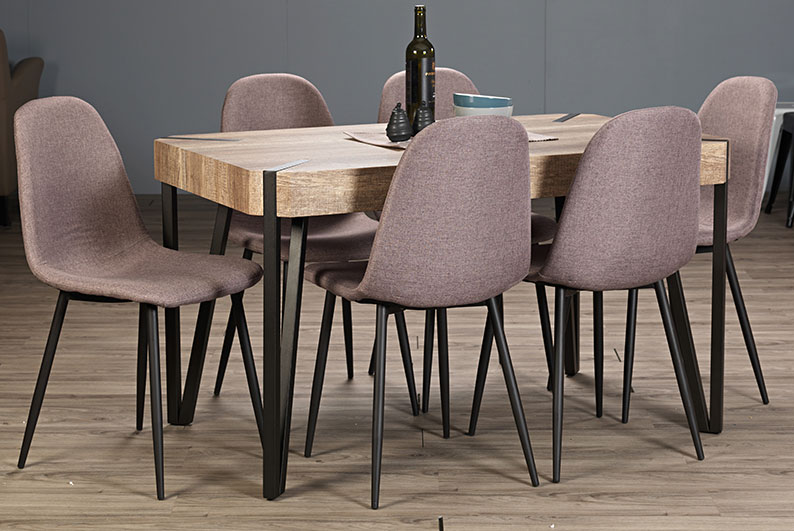
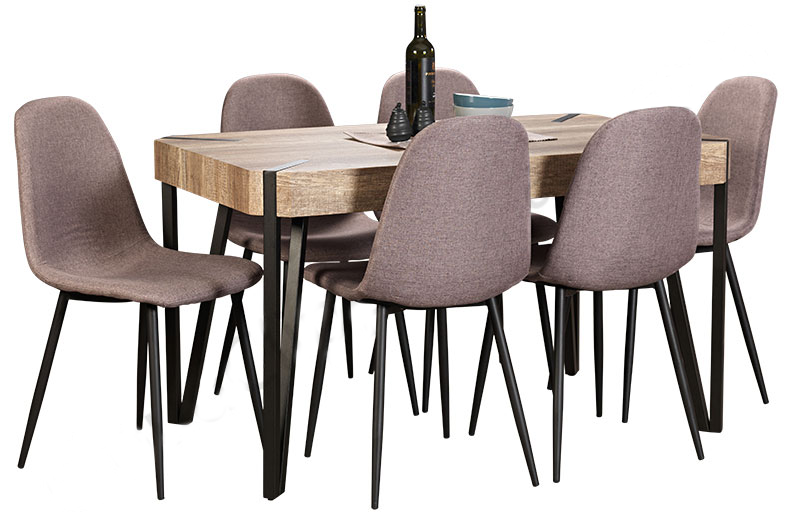
BG REMOVAL EXAMPLE

[et_pb_andafter before_image=”https://lucmia.com/wp-content/uploads/2018/07/Furniture_Before.png” after_image=”https://lucmia.com/wp-content/uploads/2018/07/Furniture_After.png” admin_label=”BG Removal Example B&A” _builder_version=”3.9″ border_radii=”on|10px|10px|10px|10px” border_width_all=”5px” border_color_all=”#000000″ box_shadow_style=”preset2″] 
[/et_pb_andafter]

Clipping Path Example

[et_pb_andafter before_image=”https://lucmia.com/wp-content/uploads/2018/07/Clipping_Path_Girl_Before.jpg” after_image=”https://lucmia.com/wp-content/uploads/2018/07/Clipping_Path_Girl_After.jpg” admin_label=”CP Example B&A” _builder_version=”3.9″ border_radii=”on|10px|10px|10px|10px” border_width_all=”5px” border_color_all=”#000000″ box_shadow_style=”preset2″] 
[/et_pb_andafter]

Background Removal (BEFORE)

Lots of complex lines and angles making this a  complex job.  Would be quoted as a “Regular” order.

Background Removal (AFTER)

Clean removal of background allowing for whatever the designer would like to use for a new background.

Background Removal (BEFORE)

Fairly straight forward design. This would be quoted as “Simple” since the work could be done quickly.

Background Removal (AFTER)

Clean removal of background from original photo.  Note addition of realistic shadows back into image.

Background Removal (BEFORE)

Slightly more complex than the last, this would would be quoted as “Regular” due to complex top.

Background Removal (AFTER)

Clean removal of background with detailed work around the top decoration. Addition of shadows.

Clipping Path (BEFORE)

Clean removal of background allowing for whatever the designer would like to use for a new background.

Background Removal (AFTER)

Clean removal of background from original photo.  Note addition of realistic shadows back into image.

Background Removal (AFTER)

Clean removal of background with detailed work around the top decoration. Addition of shadows.

Ready to Get Started?

If you are already aware of what this is and are ready to get started, click the order button below.

Our background removal and clipping path or masking services allow you to take your photographs to the next level. Pay your photographer for 1 picture of a dress you have in 12 colors, and we can make the additional images for you. Guaranteed to save you money by sending this service out to us, vs paying an in-house graphic designer to spend hours doing this tedious task. Get started by clicking the Order Now button below.